Patriotic 4th of July Plush Pillow
The plush yarn has been around for a long time, but recently it became especially trendy. I tried to master this yarn three times but failed each attempt. Encouraged to make something for the 4th of July, I decided to try a super cute and easy-to-follow Star Pillow pattern by Marina Kambur (@enjoy_toys from Instagram). And, bam! It was a success! My very first FINISHED plush project. And look how perfect it is for the coming holiday!

After acquiring some confidence in working with plush yarn I was encouraged to make a set of my own patriotic pillows. Here is my first pillow! It made a great addition to my star! And just in time for the 4th of July.

The pattern is almost effortless. It works up pretty quickly, so you still have plenty of time to make a set or two for the upcoming patriotic holidays. I hope you will enjoy this pattern as much as I did.
Tools and Materials
- Bernet Blanket plush yarn in Blue, Red, and White colors
- Hook H/8 (5mm), or any other hook needed for your tension.
- Marker
- Tapestry needle
- Scissors
Abbreviations
- MR – Magic Ring
- CH – Chain
- ST – Stitch
- SC – Single Crochet
- INC – Increase
- DEC – Decrease
- Sl St – Slip Stitch
Instructions
Make two circles following the instructions below.
R1: 8 sc into MR (8)
R2: 8 inc (16)
R3: (sc, inc) * 8 (24)
R4: (inc, 2 sc) * 8 (32)
R5: (3 sc, inc) * 8 (40)
R6: sc, inc, (4 sc, inc) * 7, 3 sc (48)
Make 3-4 extra sl sts. Cut the yarn and pull out the tail. Insert the hook from the wrong side through the back loop and pull the yarn tail in (photo 1). Now the tail is on the wrong side. Step one or two sts back and insert the hook from the wrong side through the back loop again to create a nice smooth edge.

At this point, you have an almost perfect circle. Now, attach the red color of yarn next to the yarn tail. (photo 2)
R7: Ch 1, sc into the same st as ch 1 (we will be ignoring ch 1 in the end), 1 sc, inc, (5 sc, inc) * 7, 3 sc (56) (photo 2)

After reaching the end of the round, ignore ch 1 and continue crocheting into the 1st sc of the previous round (photo 2).
R8: (6 sc, inc) * 8, (64)
R9: 3 sc, inc, (7 sc, inc) * 7, 4 sc (72)
R10: (8 sc, inc) * 8 (80)
Make 3-4 extra sl st and cut the yarn. Insert the hook from the inside through the back loop and pull the yarn tail in (photo 1).
Now, attach the white color of yarn next to the yarn tail. (photo 2).
R11: Ch 1, sc into the same st as ch 1 (we will be ignoring ch 1 in the end), 8 sc, inc, (9 sc, inc) * 7, (88) (photo 2).
After reaching the end of the round, ignore ch 1 and continue crocheting into the 1st sc of the previous round. (photo 2).
R12: 5 sc, inc, (10 sc, inc) * 7, 5 sc (96)
R13: (11 sc, inc) * 8 (104)
R14: 6 sc, inc, (12 sc, inc) * 7, 6 sc (112)
Make 3-4 extra sl st and cut the yarn. Insert the hook from the inside through the back loop and pull the yarn tail in (photo 1).
Now, attach the red color of yarn next to the yarn tail (photo 2).
R15: Ch 1, sc into the same st as ch 1 (we will be ignoring ch 1 in the end), 7 sc, inc, (13 sc, inc) * 7, 5 sc (120) (photo 2).
R16: (14 sc, inc) * 8 (128)
R17: 7 sc, inc, (15 sc, inc) * 7, 8 sc (136)
R18: (16 sc, inc) * 8 (144)
Make 3-4 extra sl st and cut the yarn. Insert the hook from the inside through the back loop and pull the yarn tail in (photo 1).
Now, attach the white color of yarn next to the yarn tail (photo 2).
R19: Ch 1, sc into the same st as ch 1 (we will be ignoring ch 1 in the end), 143 sc (144)
R20: 144 sc, finish the round with 1 or 2 sl st.

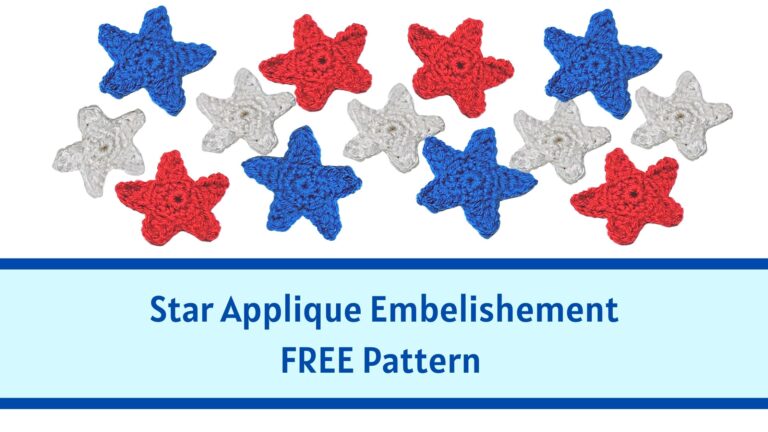
Star
R1: 8 sc into MR (8)
R2: 8 inc (16)
R3: (ch 4, 1 sc into 2nd st from the hook, hdc into 3rd st from the hook, dc into 4th st from the hook, skip 2 sts and work sl st into the 3rd st) * 5. At the end pull out the yarn end, insert the hook from the wrong side through the stitch where the 1st ch is coming from and pull the yarn end to the wrong side. Make a couple of knots with two yarn ends. Your star is finished.

Assembly
Before assembling the pillow, make sure you make a couple of knots with the yarn ends on the wrong side, and tie together two colors of yarn. This will secure the yarn ends and will tighten possible holes where the colors change.

Before two circles are sewn together you may sew on the star, however, I prefer to sew it when the pillow is completely stuffed and sewn. Either way, pin all the ends of the star to make sure it is sewn even.

We are going to join circles the same way as granny squares are usually joined, using white yarn. Now, place two circles together with the wrong side facing each other.

Insert through the back loop of the right circle and back loop of the left circle and pull out a loop. Keep inserting the hook through the back loop of the right circle and the back loop of the left circle all the way around until a little opening is left. Stuff the pillow. Consider stuffing it lightly so it stays flat and light.

Your pillow is finished! I hope you can bring joy to your beloved patriots and brighten up your house for the holidays!


One Comment
Comments are closed.